The presse full of coffee and ready to go!
History of coffee making – I was curious about the brewing process and the history of coffee brewing. I’ve listed some interesting points below. (I’ve also listed my sources in case you want to read more.)
- Early on, coffee was simply made by heating water and coffee beans, the beans were later ground up in a mortar and pestle to improve the brewing process
- Early coffee pots were designed to catch the grinds or beans when pouring, not when brewing
- The French are credited with inventing the filter process around 1710
- There are numerous methods and pots for brewing coffee and everyone seems to have a preference
- https://en.wikipedia.org/wiki/Coffeemaker
- http://visual.ly/complete-history-coffee-making
What is it?
This is a small, single serve coffee press that uses hot water and medium grind coffee to make a delicious cup of coffee. It’s meant to be used on the go and to keep your coffee hot for a long time. To make, put hot water and coffee in the cup. Wait 3 minutes, then press the inner mug in to filter and trap the coffee. Your coffee is ready! I was skeptical. This sounds too good to be true.
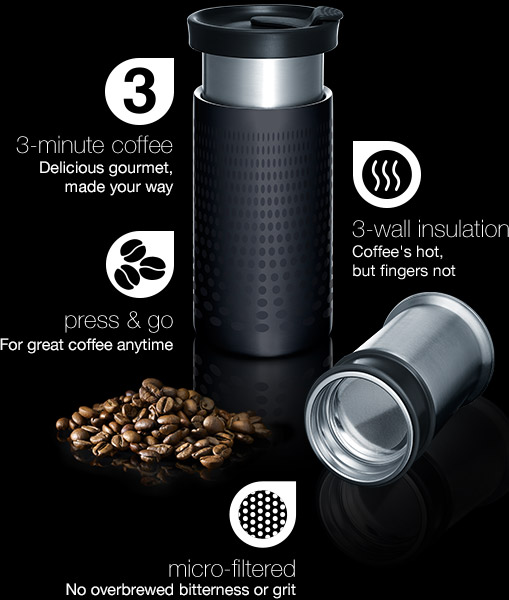
Overview of features
How I used it
I made coffee. Lots of coffee. We drink a lot of coffee in this house. In fact, that’s why we wanted to try this. Our Keurig machine gets a lot of use and since we’ve had it for several years, it’s starting to act up. Also, K-cups are SUPER EXPENSIVE! Not to mention we’re severely limited on our coffee choices. I really enjoy trying new coffee and that isn’t really possible on the Keurig without spending a fortune on a 12 pack of K-cups or using the adapter cups that don’t always work. And yes, we’ve been burned a few times when trying new k-cups or using the adapter. To try out my presse, I made hot coffee and iced coffee. I tried using hot tap water (our tap gets really hot!) and hot water from the Keurig machine (lazy, I know). Neither one got the water hot enough to keep the coffee warm for a long time. It wasn’t until I used our electric kettle that my coffee stayed warm for a long time, so make sure you are using very hot water. You might have to wait a few minutes to drink it, but it’s worth it to have hot coffee for a long time.
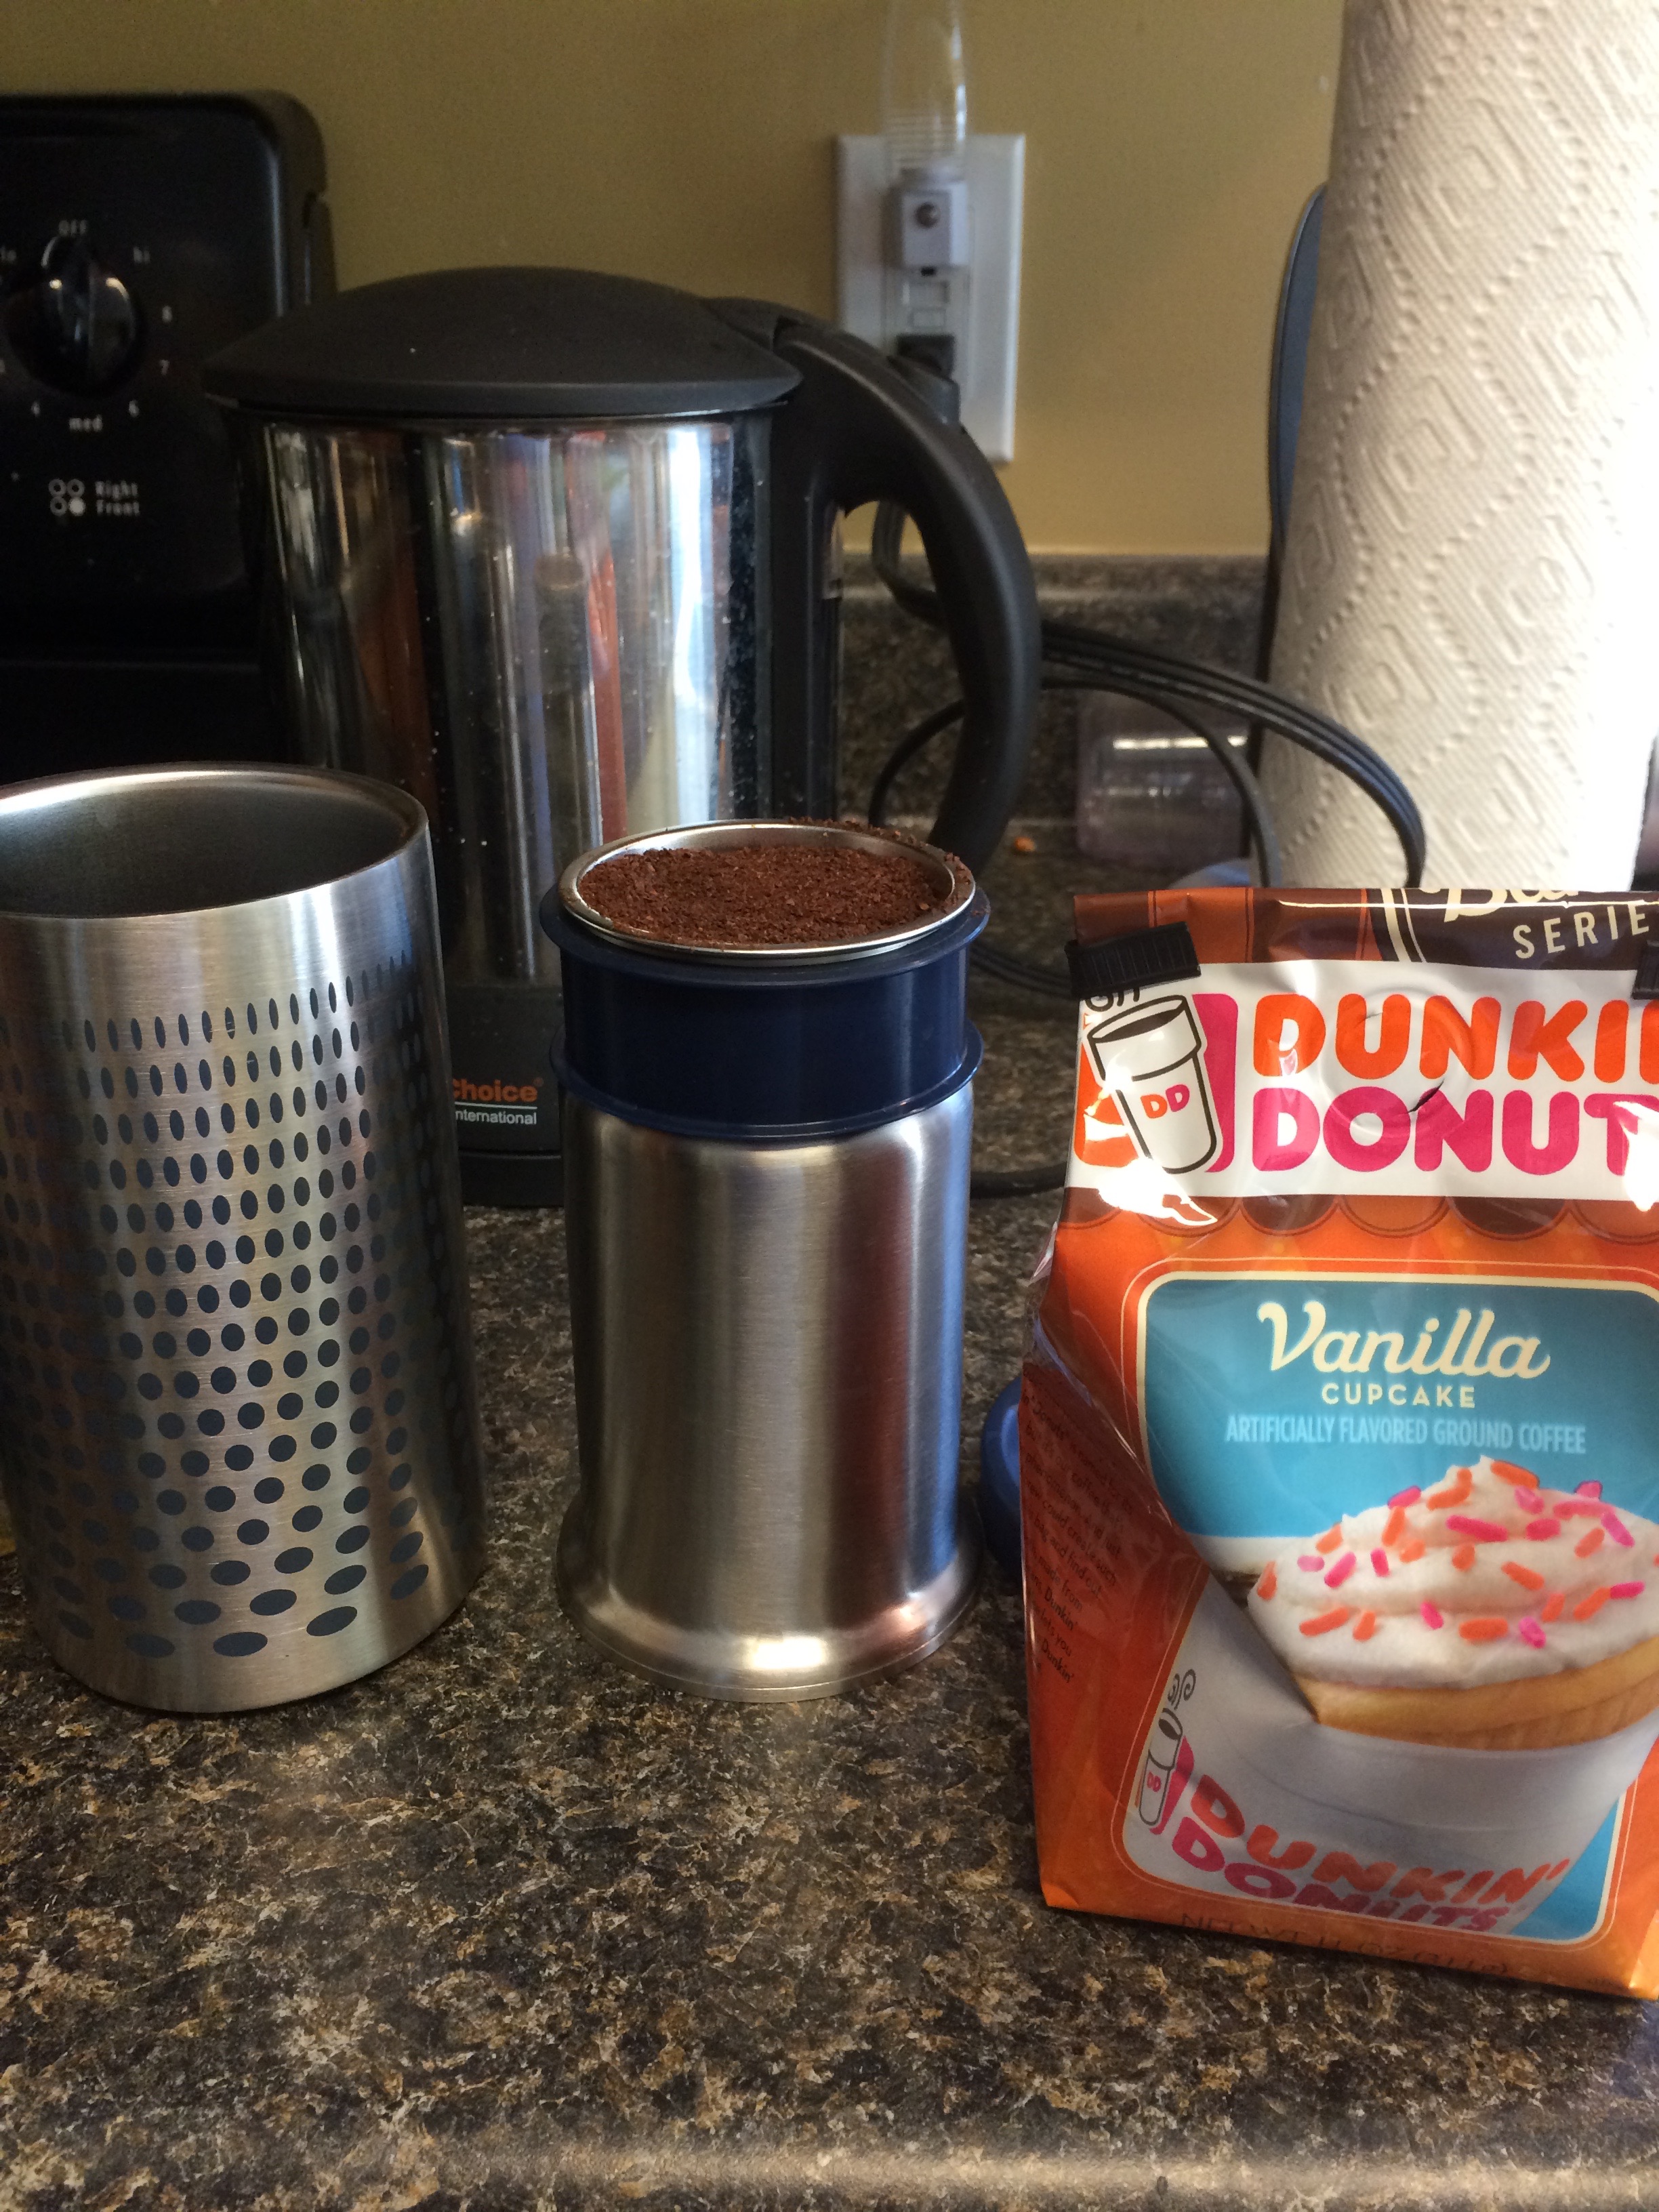
Coffee making supplies
Hot Coffee:
- Place 3 Tbsp of coffee in the outer mug (note: the little basket on the bottom of the inner mug holds about 3 Tbsp so I just used that to measure my coffee)
- Add hot water to the outer mug (about 3/4 of the way full to leave room for cream and sugar)
- Let sit for 3 minutes
- Press the inner mug down to trap the coffee grounds at the bottom
- Add cream, sugar, or whatever else you put in your coffee
- Place the lid on and go (if you use super hot water like I do you might want to wait a few minutes to drink)
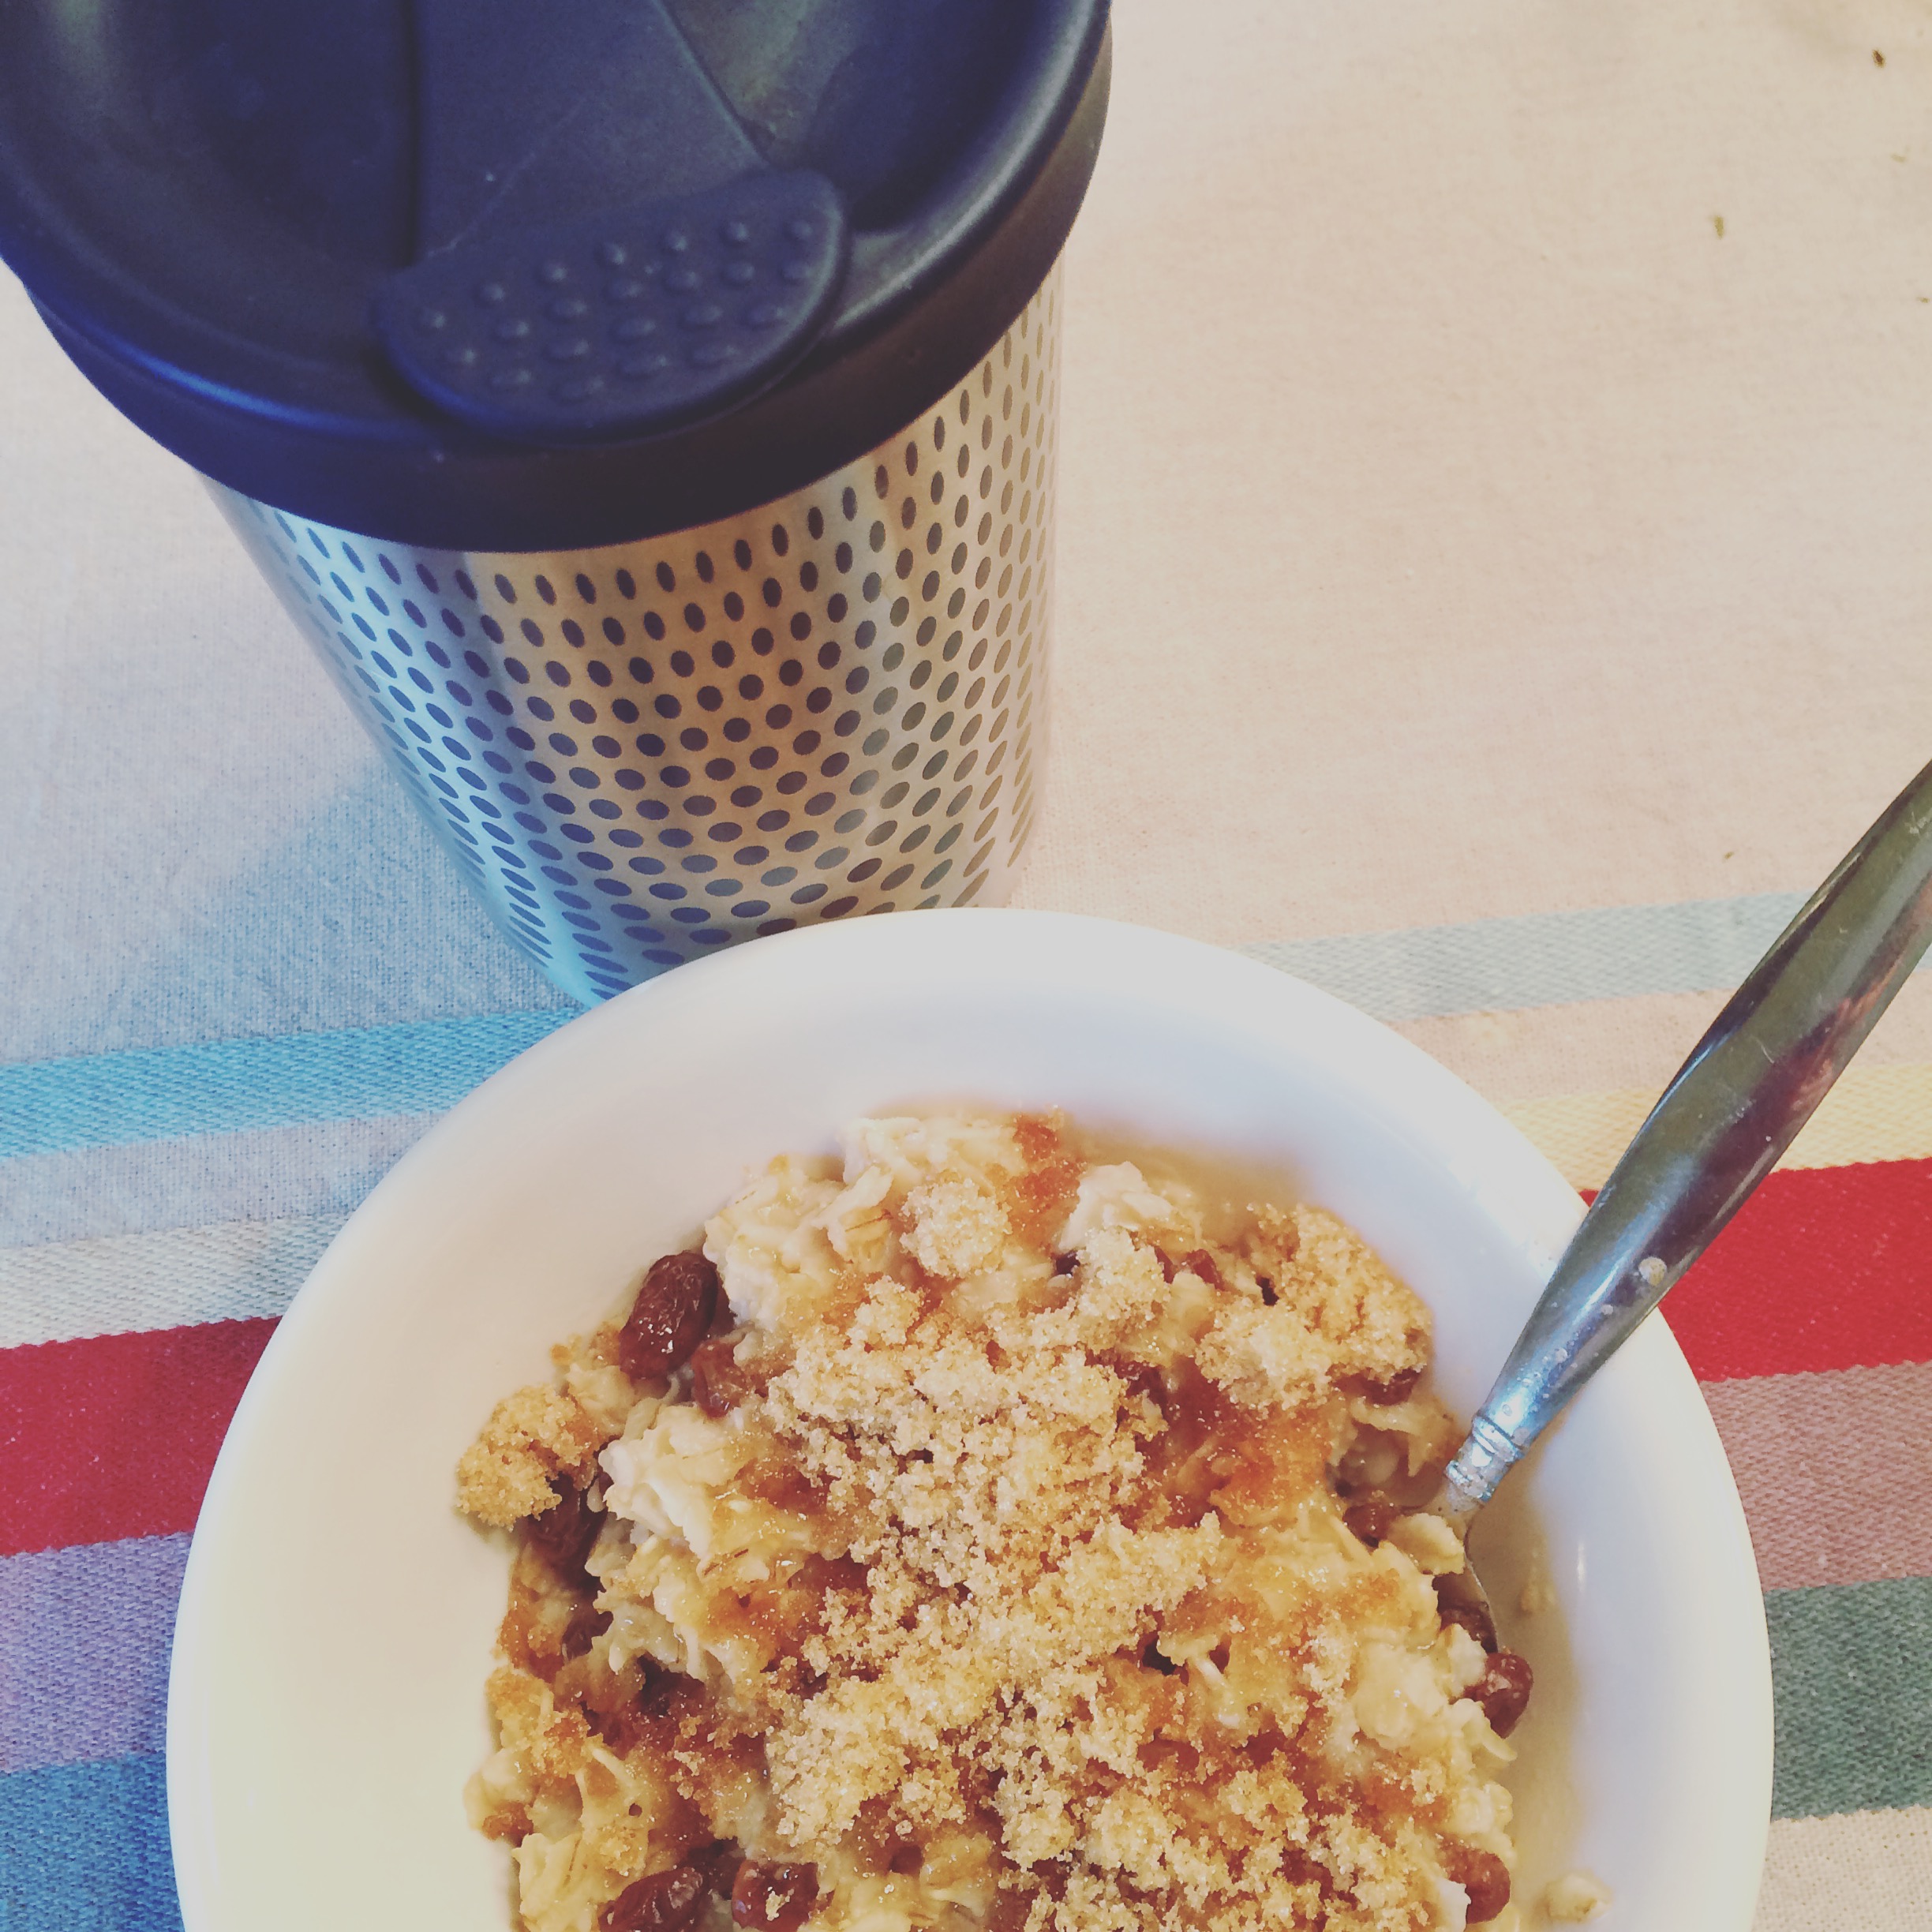
Mmmmmm…hot coffee and warm oatmeal!
Iced Coffee:
- Place 4 Tbsp of coffee in the outer mug (if your lazy like me, this is a full basket with a small mound on top)
- Add enough hot water to fill about half the outer mug (the iced will melt to create a full mug of iced coffee)
- Let sit for 3 minutes
- Fill the inner mug with ice, then press the inner mug down to trap the coffee grounds at the bottom
- Add cream, sugar, or whatever else you put in your coffee
- Place the lid on and go
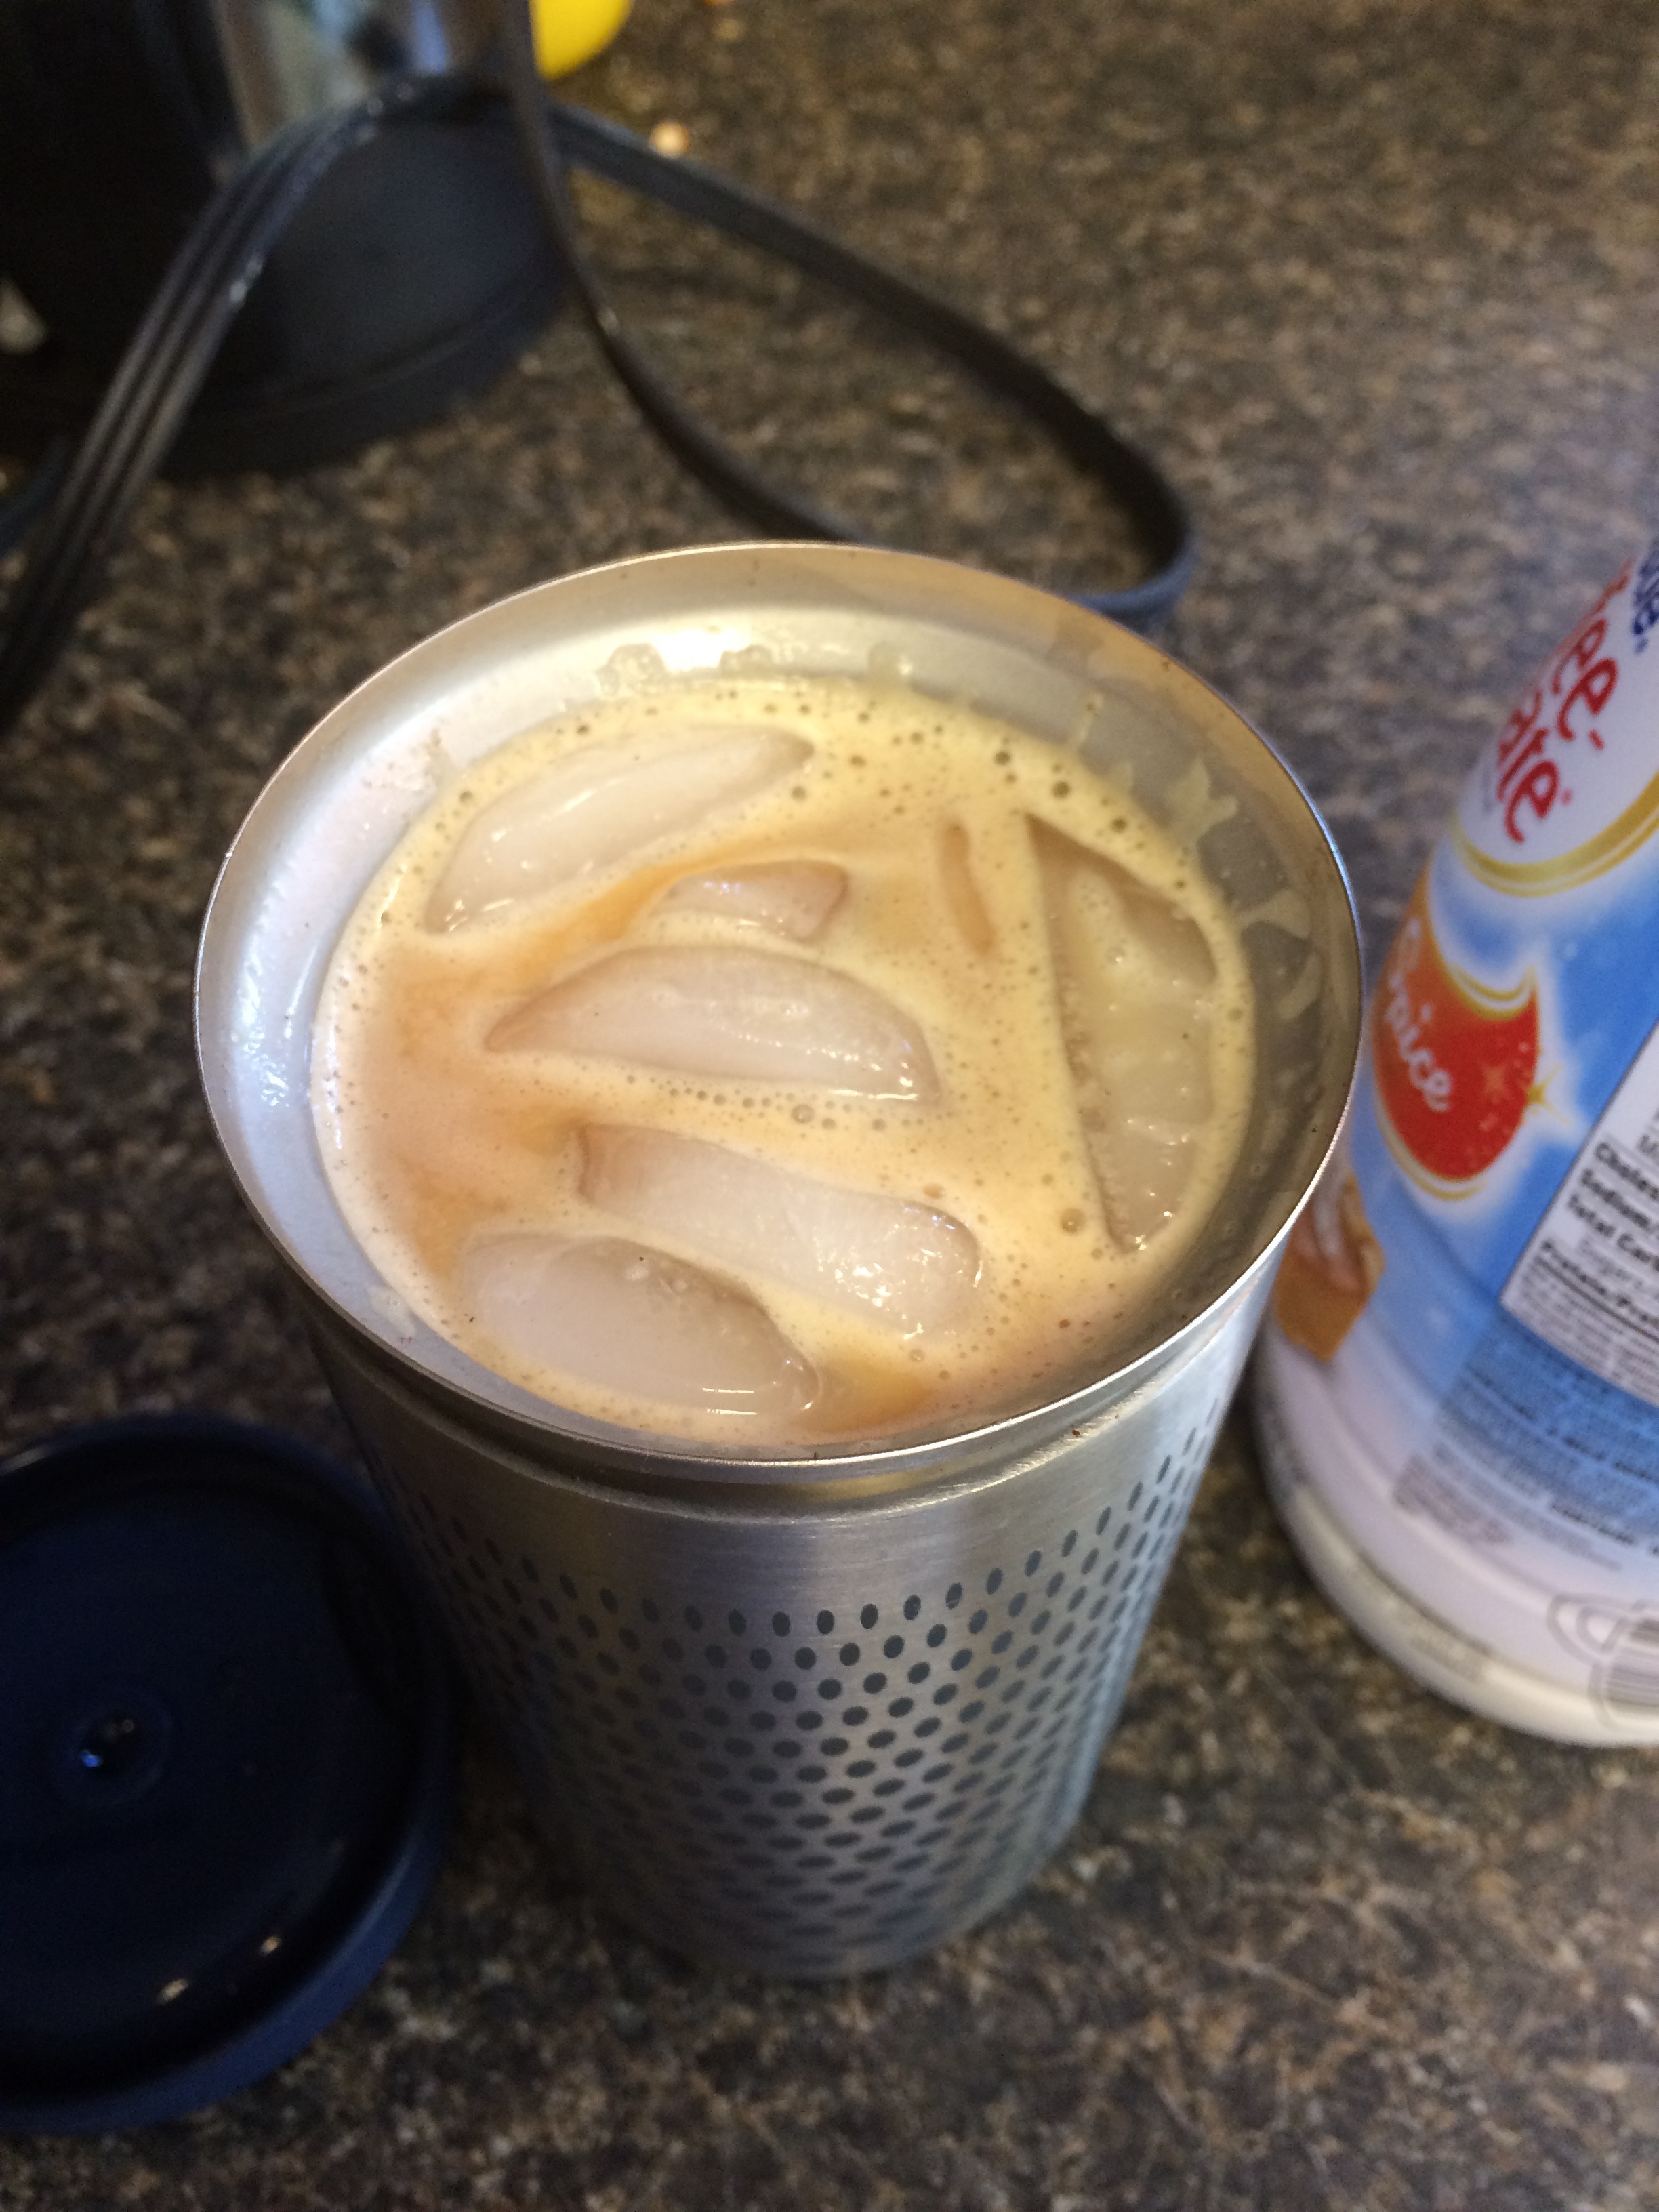
Yummy Iced Coffee
Likes
- It’s really easy to use. Seriously! Like the instructions say: Press, brew, & go!
- The coffee was delicious. I think I actually prefer this to the Keurig coffee.
- My coffee stayed hot FOREVER! YYYYEEESSS!!
Dislikes
- The first few times I used it, the lid had a chemically smell. I washed it before I used it so this was kind of surprising. The smell ruined the coffee. After using it for a while, the smell went away, but it might turn some people off of using it at first.

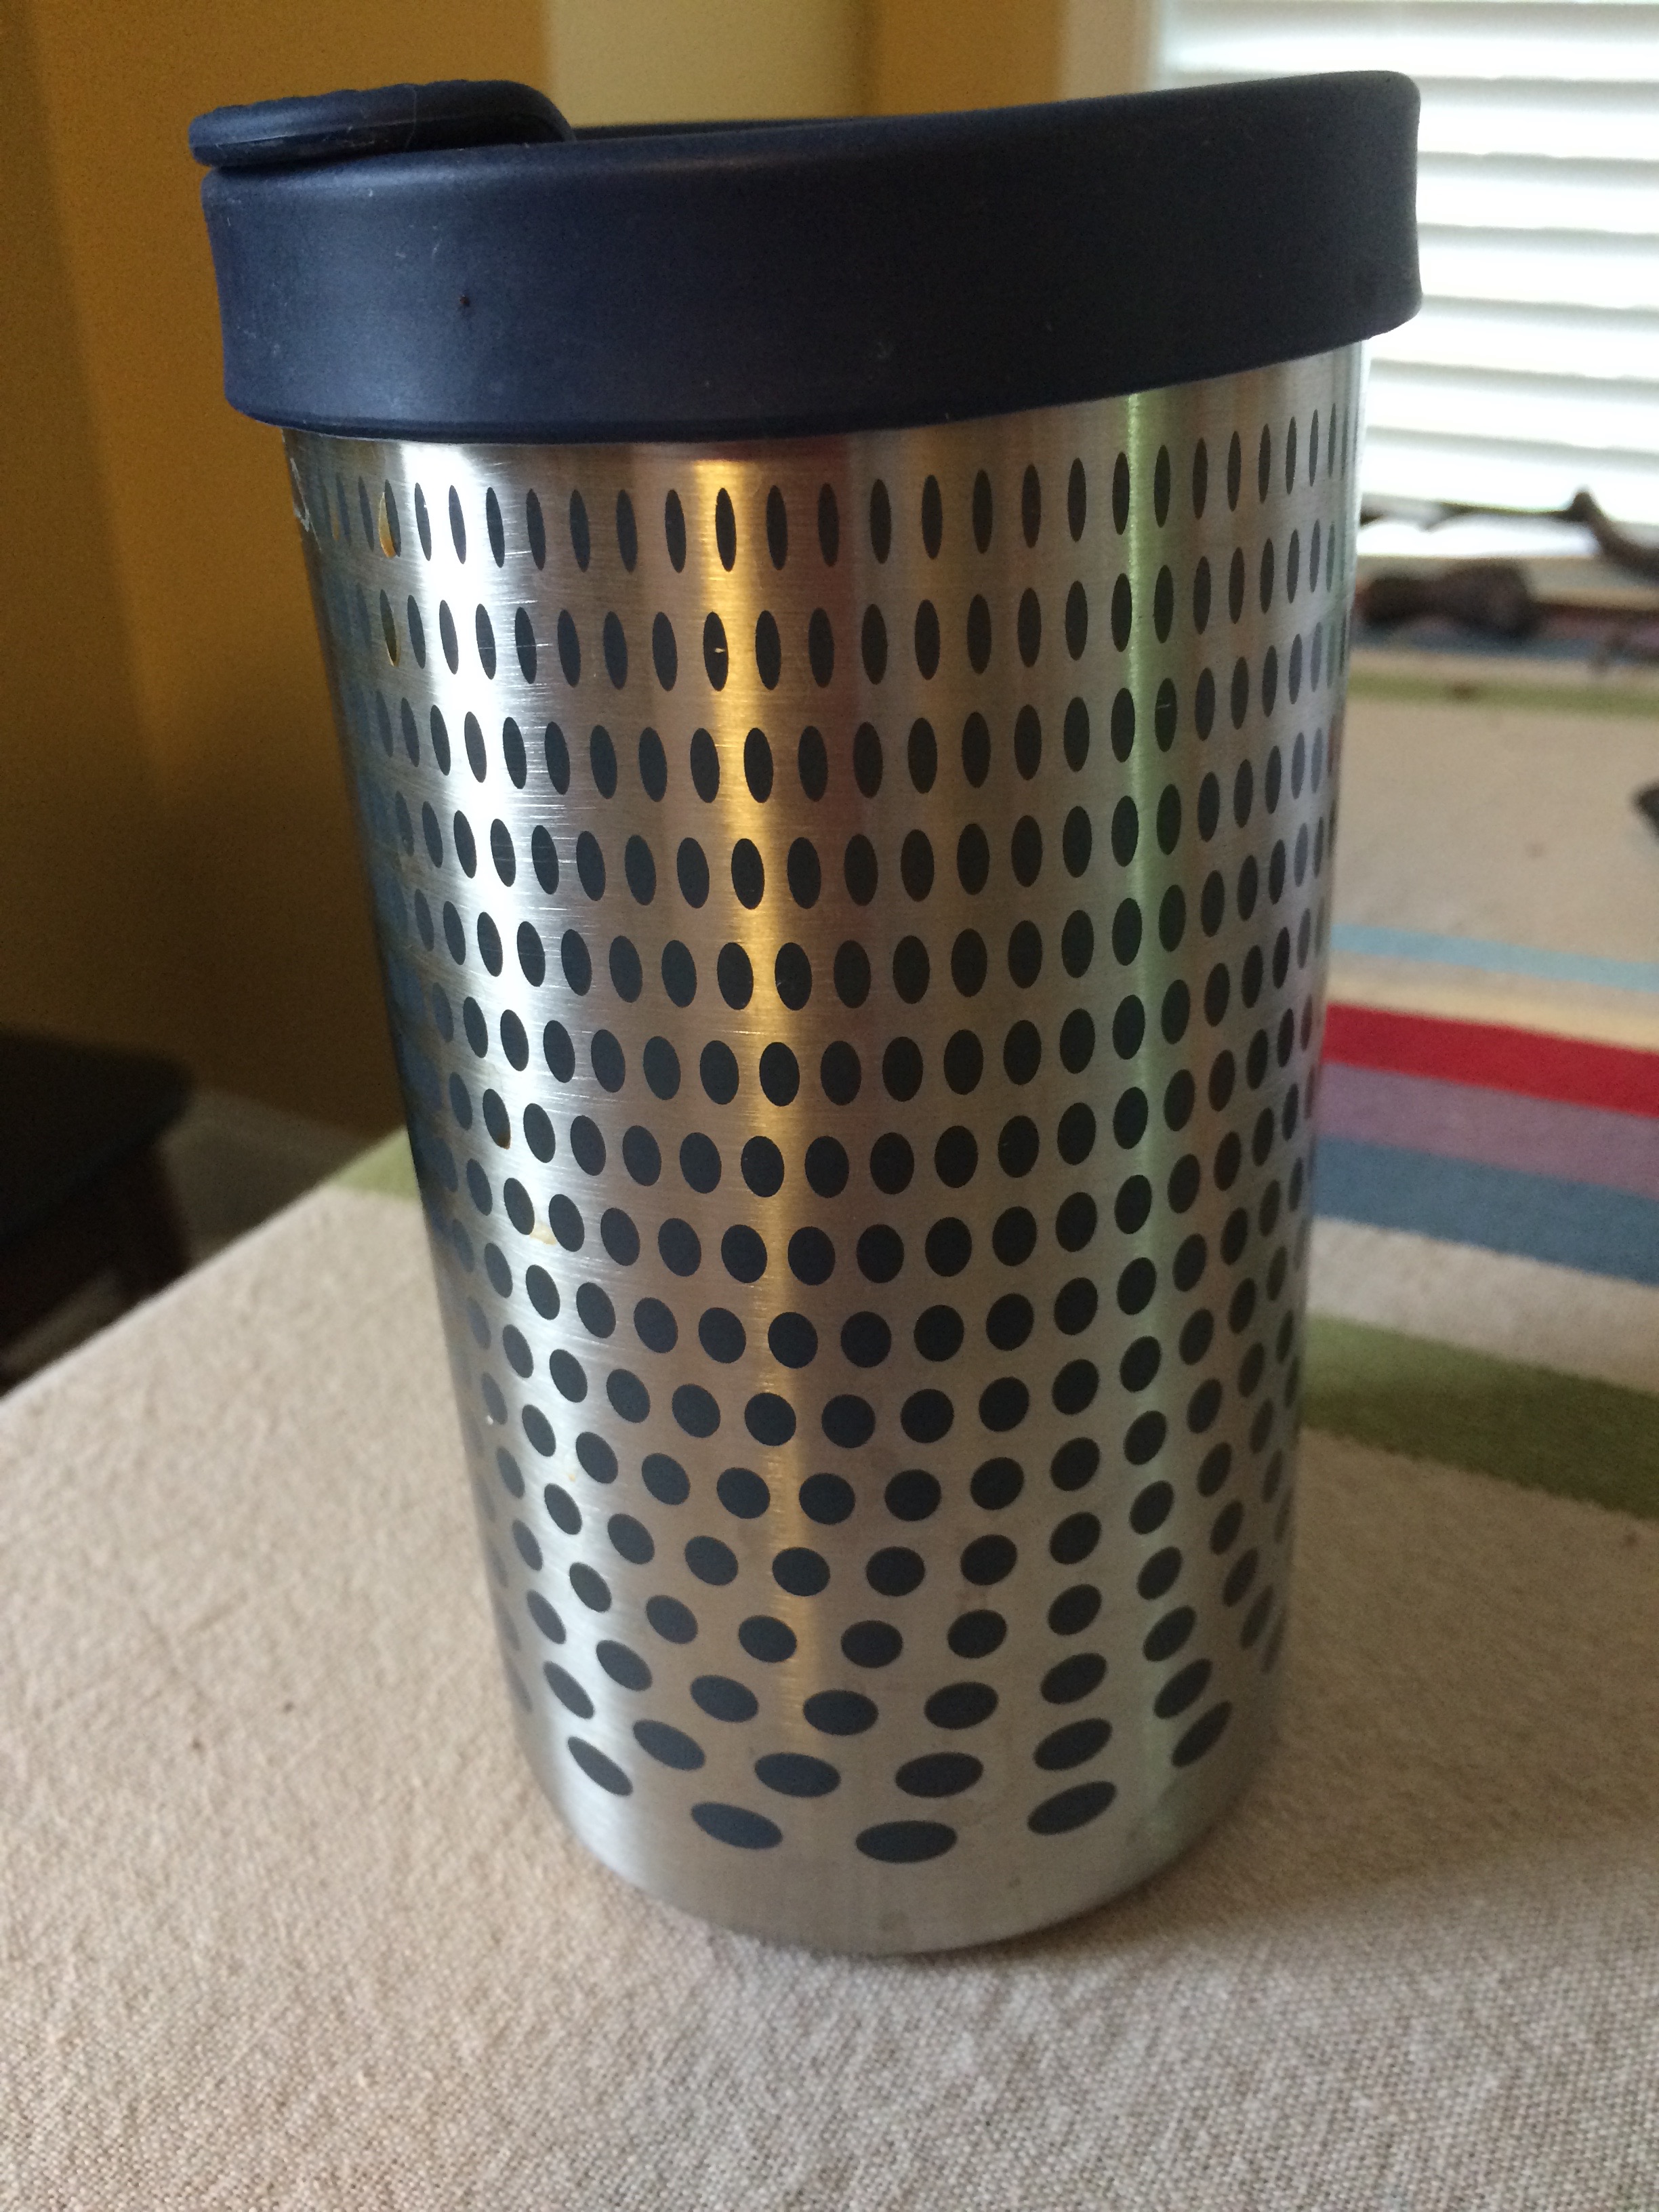
The parts (coffee beans not included)
Conclusion
It takes some practice to figure out how much hot water you need to add for your taste, but it’s worth it! This is my new coffee maker. It’s easy, convenient, and it keeps my coffee hot forever! Check it out below! They also have some recipes on their website for coffee drinks that I can’t wait to try out!
*I received this item free for the purpose of my review. Opinions are 100% my own.
**UPDATE 9-11-18** I have been using this almost everyday since I got it and I still love it! It keeps my coffee hot FOREVER!! This is my favorite way to enjoy coffee.


